This tutorial will walk you through setting up Stormkit to work completely locally using Cloudflare Tunnel, allowing you to serve your application with HTTPS through your own domain while running everything on your local machine.
## Prerequisites
- A Cloudflare account
- A domain managed by Cloudflare (a top-level domain or advanced certificate manager is required)
## Overview
This setup allows you to:
- Run Stormkit locally
- Use Cloudflare Tunnel to expose your local development server
- Serve your application through your custom domain with automatic HTTPS
- Support wildcard subdomains for deployment endpoints
## Step 1: Configure Stormkit Environment
Run the following command to install Stormkit with a single command.
```bash
curl -sSL https://www.stormkit.io/install.sh | sh
```
Alternatively, copy the contents of this [docker-compose.yaml](https://github.com/stormkit-io/bin/blob/main/docker-compose.yaml) file and create an `.env` file similar to [this example](https://github.com/stormkit-io/bin/blob/main/.env.example). Make sure both live in the same directory.
Add the following environment variables to the `.env` file:
```bash
# Disable HTTPS in Stormkit as it is going to be handled by Cloudflare
STORMKIT_HTTPS=off
# Optional: Set custom HTTP port (default is 8888)
STORMKIT_HTTP_PORT=80
# Set your domain: must be a top-level domain as Cloudflare supports automatic certificate
# generation for top and first level domains (example.com and *.example.com). Alternatively,
# you can purchase their Advanced Certificate Manager for more complex cases.
STORMKIT_DOMAIN=my-top-level-domain.com
```
Restart the containers so that environment variables take effect:
```bash
docker compose down hosting workerserver && docker compose up -d hosting workerserver
```
## Step 2: Set up Cloudflare Tunnel
### Access the Cloudflare Dashboard
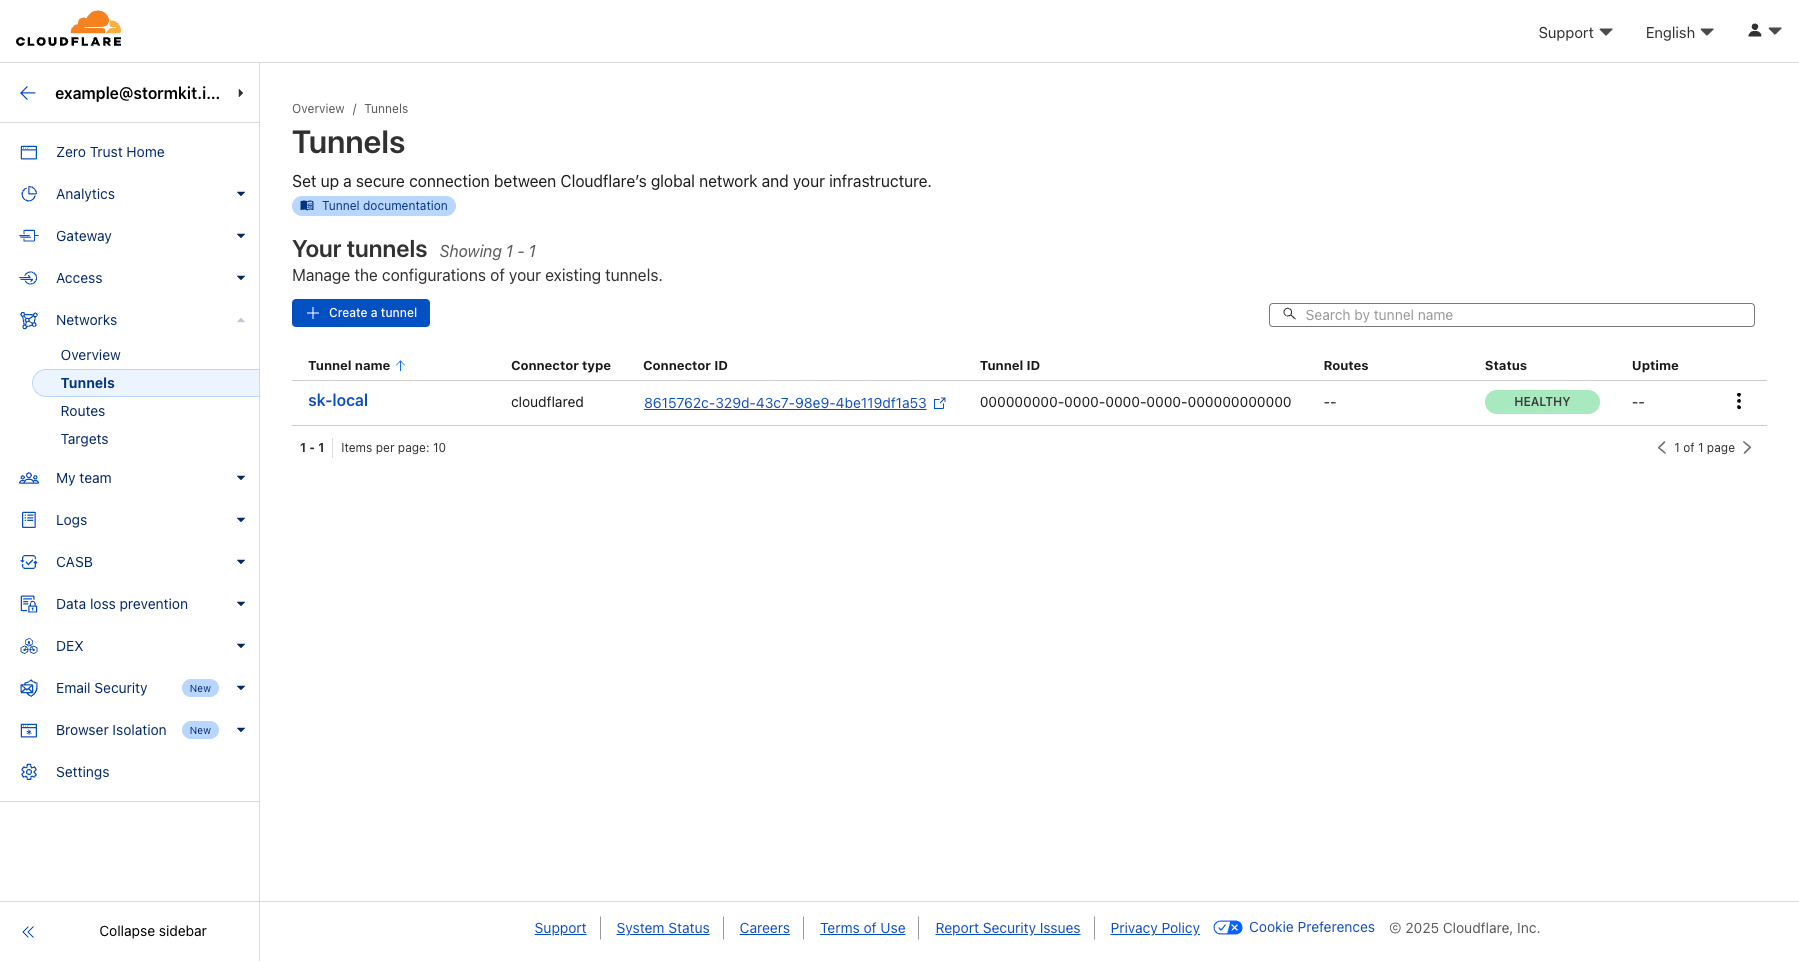
1. Log into your Cloudflare account
2. Navigate to **Zero Trust** → **Networks** → **Tunnels**
3. Click **Create a tunnel**
4. Choose **Cloudflared** and name your tunnel
5. Click **Save tunnel**
### Install the Connector
Follow the instructions on the screen to:
- Install the connector on your local environment and
- Run the tunnel
You should see an output like this:
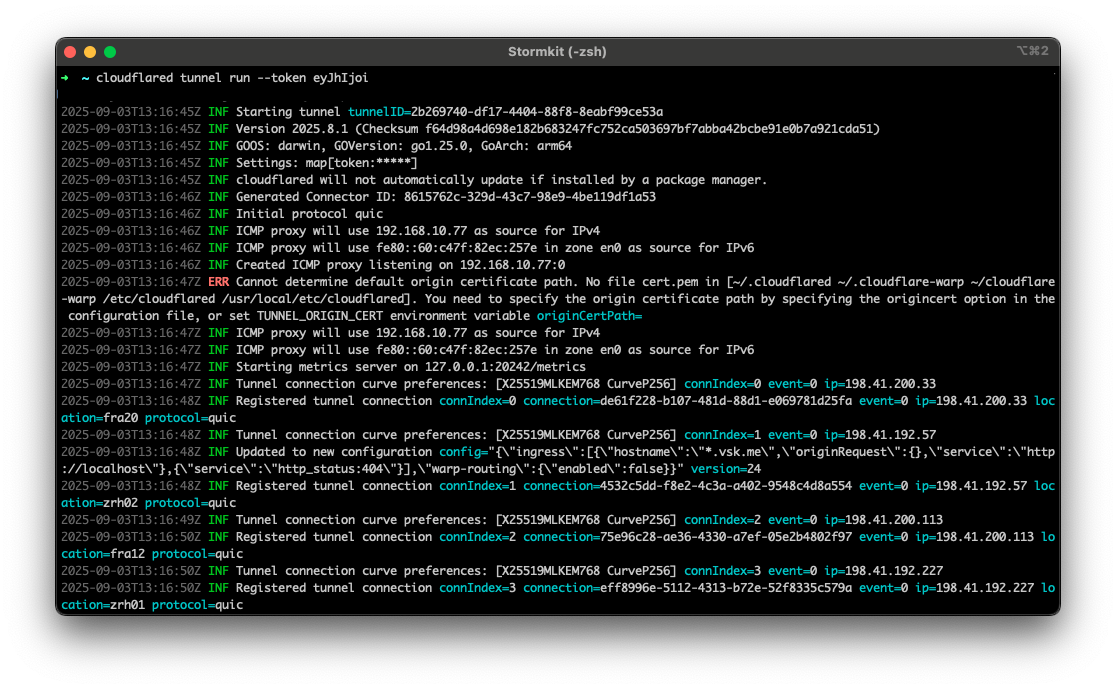
Then, click next to configure your hostname.
## Step 3: Configure Public Hostname
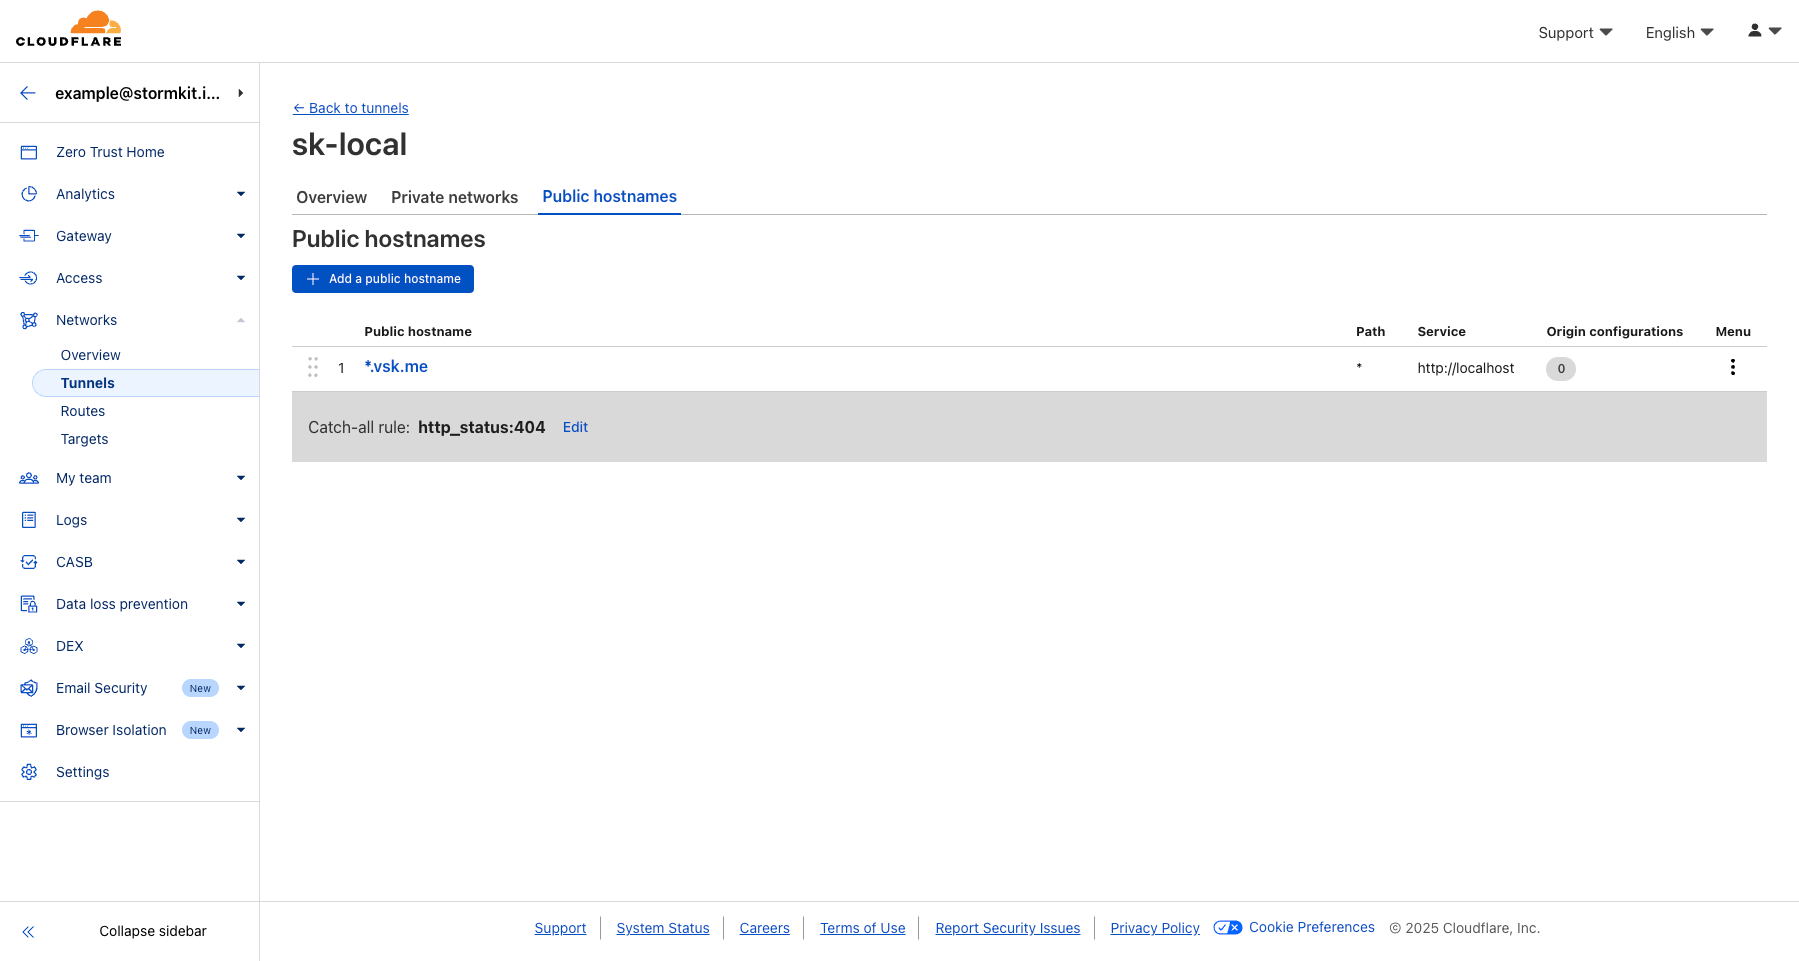
In the **Public Hostnames** section of your tunnel:
1. Click **Add a public hostname**
2. Configure the following settings:
- **Subdomain**: `*` (for wildcard support)
- **Domain**: my-top-level-domain.com
- **Path**: Leave blank
- **Service Type**: `HTTP`
- **URL**: `localhost:80` (match your `STORMKIT_HTTP_PORT`)
### Important Notes:
- The port in the URL must match your `STORMKIT_HTTP_PORT`
- Service type should be `HTTP`, not `HTTPS`
## Step 4: Configure Cloudflare SSL/TLS Settings
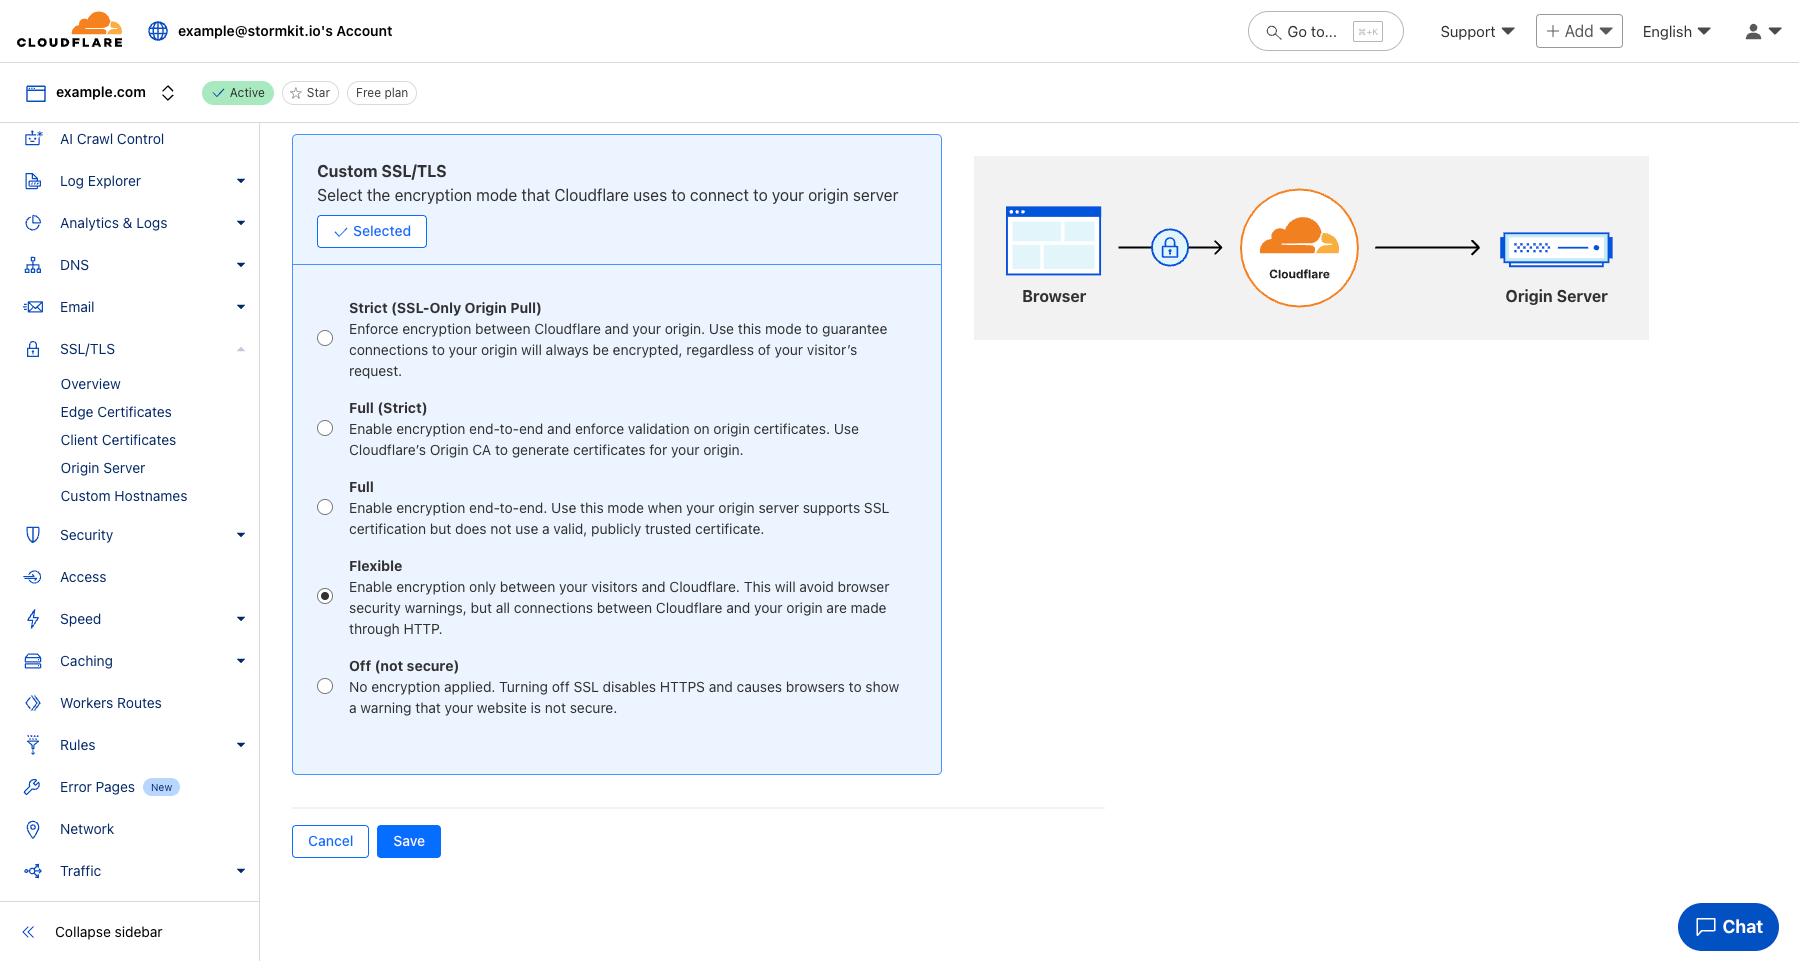
1. Go to **SSL/TLS** → **Overview** in your Cloudflare dashboard
2. Set **SSL/TLS encryption mode** to **Flexible**
### Why Flexible Mode?
- **Flexible**: Cloudflare ↔ Visitor (HTTPS) + Cloudflare ↔ Origin (HTTP)
- This matches our setup where Stormkit runs HTTP locally but visitors get HTTPS
## Step 5: DNS Configuration
The DNS records are created automatically when you set up the public hostname. You should see:
- An `A` or `AAAA` record for your domain pointing to Cloudflare's tunnel
- Automatic wildcard support if configured
## Step 6: Verify
You should be able to visit `https://stormkit.your-top-level-domain.com` and access the Stormkit Dashboard.
## Troubleshooting
### Common Issues:
**Port Mismatch**
- Ensure `STORMKIT_HTTP_PORT` matches the port in your Cloudflare tunnel configuration
**SSL Errors**
- Verify SSL/TLS mode is set to "Flexible"
- Check that `STORMKIT_HTTPS=off` is set
**Subdomain Not Working**
- Ensure you used `*` for the subdomain in tunnel configuration
- Consider purchasing Advanced Certificate Manager for full wildcard SSL support
**Tunnel Not Connecting**
- Check that `cloudflared` service is running
- Verify the installation token was copied correctly
This setup provides a production-like development environment while keeping everything local and under your control!